Wire Racer
25 Mar 2016 - Alfie J.
Synopsis
As part of my Computer Graphics module at City, University of London, I decided to create an interactive demonstration in the style of an old-school racing game for the coursework.
The game draws light inspiration from classic titles such as Wipeout by Psygnosis. The player's objective is to collect as many of the pickups as possible (to increase score) and to finish the race in the fastest time possible.
This majority of the code in the demonstration was written in the C++ Programming Language. The graphics are programmed and rendered using Modern OpenGL (4+) and the rendering/shader pipeline (as opposed to the old-school, deprecated, fixed-function pipeline present in earlier versions) with GLSL.
The track in the game is defined by a cubic/centripetal Catmull-Rom Spline with C¹ continuity. This allows a path to be generated based on a set of control points and the transition between each said point to happen smoothly over a set period of time.
The scene features a background audio track accompanied by some 3D point-audio sources with distance-based roll-off, filtering, and the doppler effect. The audio is programmed with the help of functions from the FMOD library.
Demo Video
Features
Prototype
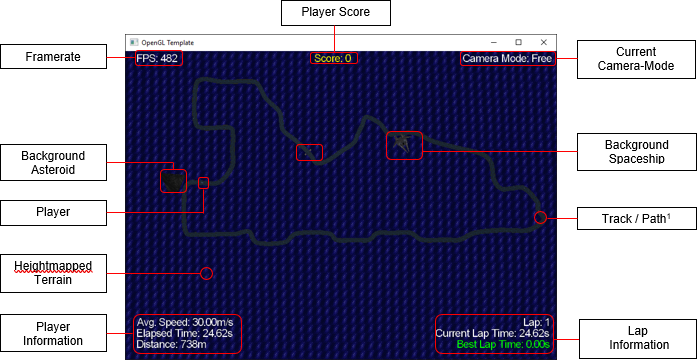 A prototype of the demonstration - showing the core aspects of the scene and GUI elements
Path
The path / track in my scene is created using a Cubic Catmull-Rom spline with C¹ continuity. The track is loosely modelled around the "Stanza-Inter" circuit from "Wipeout 3 by Sony Computer Entertainment".
I calculated a total of 65 control points and stored them in a two text files - one for the co-ordinates and the other for the up-vectors.
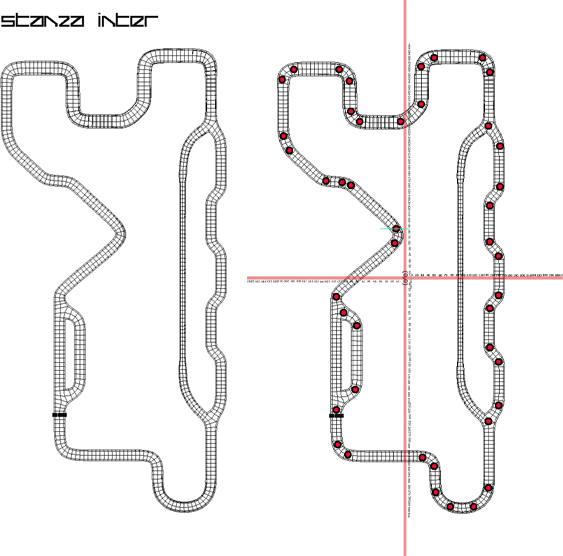 A side-by-side comparison of Stanza-Inter and the control points (red circle) loaded in by the simulation
Both files are loaded and read by a class called CTrackLoader. The points are used to populate the 'm_controlPoints' and 'm_controlUpVectors' members (std::vectors) from CCatmullRom respectively.
I found this a much more suitable approach than hard-coding 130 (or more for different circuits) 'glm::vec3' in code. This also allows for expansion by creating additional circuits in a text format and loading them in.
Camera
The scene has a default camera following the player's spaceship in a first-person styled view. The user can interact with the demo and switch between pre-set camera views using the '1-5' keys on the keyboard. The possible choices include:
- First-Person ('1' key)
- Third-Person ('2' key)
- Side-View ('3' key)
- Top-Down ('4' key)
- Free-Camera ('5' key)
The camera views are calculated using a TNB-frame (and the Frenet-Serret formulae). At each iteration of the GameLoop, a new TNB frame is calculated and such geometry is modified to set the relevant camera views. A camera-view 'mode' is identified by a simple integer, by which a function (SetCameraMode() in this case) operates using a switch-statement to identify the desired mode. With this kind of design, it's very simple to map a keyboard keystroke to an action; for example, on keypress '1', SetCameraFirstPerson() simply sets the camera mode to 0.
A code example of how each of the views are calculated can be found below:
void Game::SetCameraMode(int mode)
{
    switch(mode)
    {
        case 0:
        {
            m_pCamera->Set(m_pPlayer->GetPosition() + (1.1f * m_pathB)
                                                    + (-1.1f * m_pathT),
                           m_pPlayer->GetPosition() + (100.0f * m_pathT),
                           m_pathUp);

            m_cameraModeStr = "First Person";
            break;
        }
        case 1:
        {
            m_pCamera->Set(m_pPlayer->GetPosition() + (3.5f * m_pathB)
                                                    + (-10.0f * m_pathT),
                           m_pPlayer->GetPosition() + (20.0f * m_pathT),
                           m_pathUp);

            m_cameraModeStr = "Third Person";
            break;
        }
        case 2:
        {
            m_pCamera->Set(m_pPlayer->GetPosition() + (-0.75f * m_pathB)
                                                    + (-5.0f * m_pathT)
                                                    + (2.5f * m_pathN),
                           m_pPlayer->GetPosition() + (170.0f * m_pathT),
                           m_pathUp);

            m_cameraModeStr = "Side View";
            break;
        }
        case 3:
        {
            m_pCamera->Set(m_pPlayer->GetPosition() + (20.0f * m_pathB),
                           m_pPlayer->GetPosition() + (3.5f * m_pathT),
                           glm::vec3(0,1,0));

            m_cameraModeStr = "Top Down";
            break;
        }
        case 4:
        {
            m_pCamera->Update(m_dt);
            m_cameraModeStr = "Free";
            break;
        }
    default:
        break;
}
Basic Objects
There are a few basic objects in my scene that are created entirely from OpenGL primitive types. Some examples include the track itself, the barriers on the edge of the track, a sound-emitting cube, a tetrahedron, and a square-based pyramid.
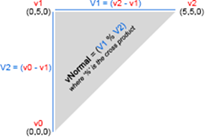
The normals of a vertex were calculated as:
Track/Barriers
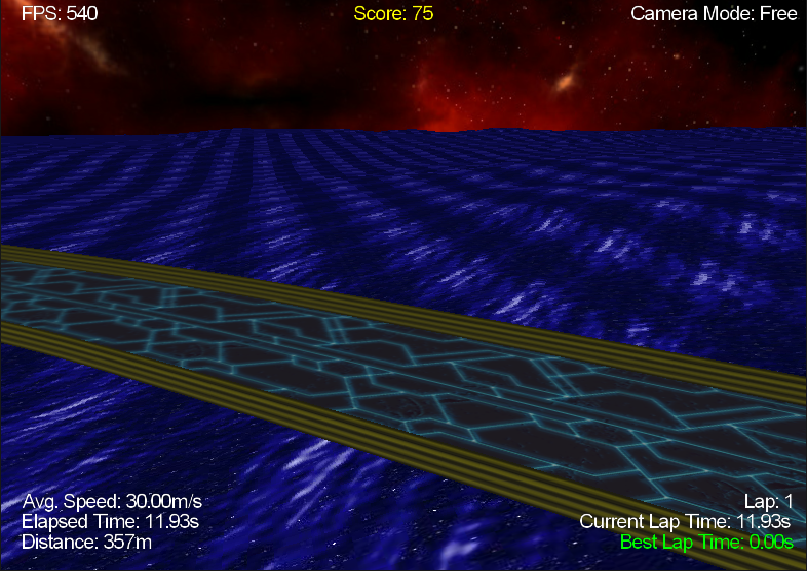
- Usage: To represent the "floor / ground" of the track
- Created Using:
GL_TRIANGLE_STRIP(2 calls for barriers) - Texture Mapped: Yes
- Normals Calculated: Yes
Cube

- Usage: To represent a music-emitting box in the game world
- Created Using:
GL_TRIANGLE_STRIP - Texture Mapped: Yes
- Normals Calculated: Yes
Tetrahedron
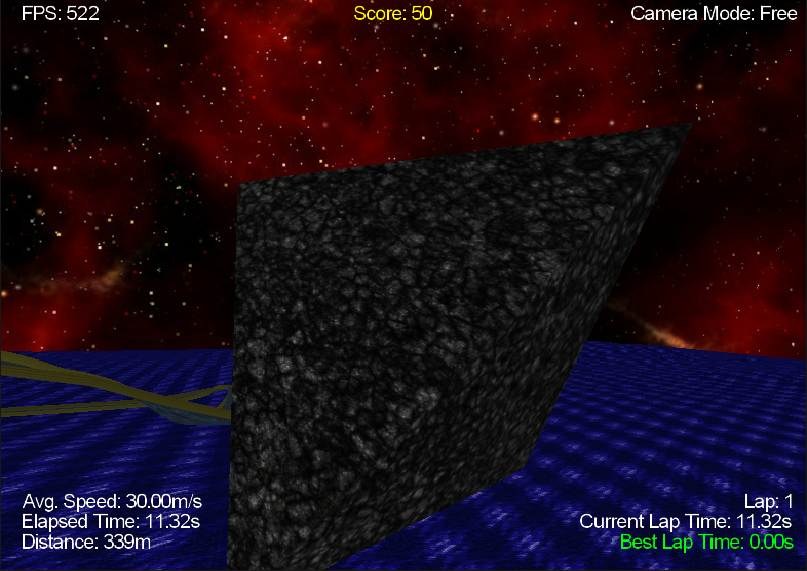
- Usage: To represent a comet in the game world
- Created Using:
GL_TRIANGLES - Texture Mapped: Yes
- Normals Calculated: Yes
Pyramid (Square-based)
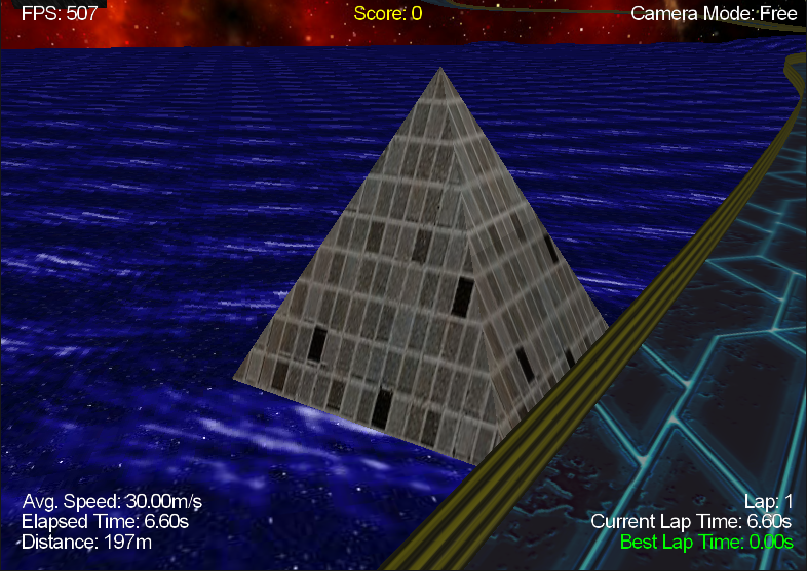
- Usage: To represent track starting pillars
- Created Using:
GL_TRIANGLE_STRIP - Texture Mapped: Yes
- Normals Calculated: Yes
Meshes
There are four mesh based objects in my scene, each of which possess appropriate normal and texture-coordinates. Two objects share a common mesh, the player's spaceship and a background ship. The 3D Meshes are loaded from disk using the OpenAssetImport library.
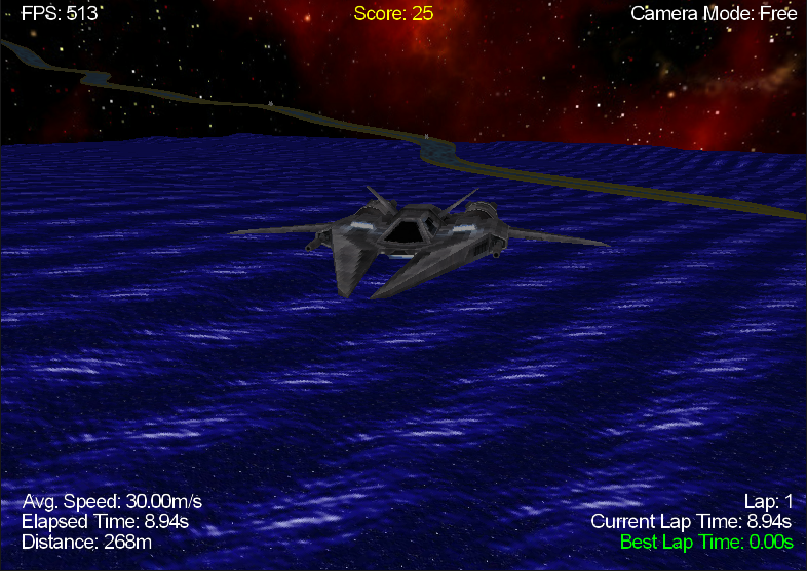 A spaceship mesh used in the scene
The pickups in the scene are mesh-based objects that resemble a generic type of Space Invader from the 1978 classic, Space Invaders by Taito.
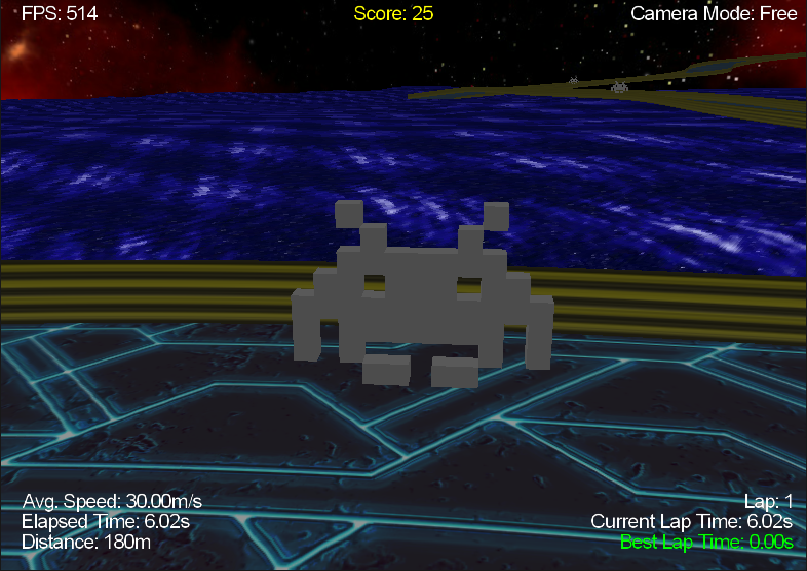 The mesh used for the pickups in the scene
The final mesh based object in the scene is the height-mapped terrain. It's created using a Face-Vertex Mesh.
Lighting
The game world is comprised of three different sources of light and a single material. The material is set once (via some variables in the vertex shader with a solid white colour, white ambience, white diffuse, and white specular). This makes meshes and other game objects reflect purely coloured lights from the various sources.
The lights present in the scene are:
- Default Light
- Player Highlight
- Forward-facing headlights
light1
- Type: Directional
- Visual: A dim white light (RGB=0.2 for ambience, diffuse, and specular)
- Purpose: Adds luminosity to the scene
- Position: Static
light2
- Type: Spotlight
- Visual: Spotlight facing down under the player's spaceship
- Purpose: Helps to identify the location of the player
- Position: Dynamic (moves with respect to the player's position)

light3
- Type: Spotlight
- Visual: Forward white spotlight with a small exponent and large cut-off
- Purpose: Forward lighting for headlights
- Position: Dynamic (moves with respect to the player's position)
- Notes: Light position faces the T-vector of the player's TNB frame
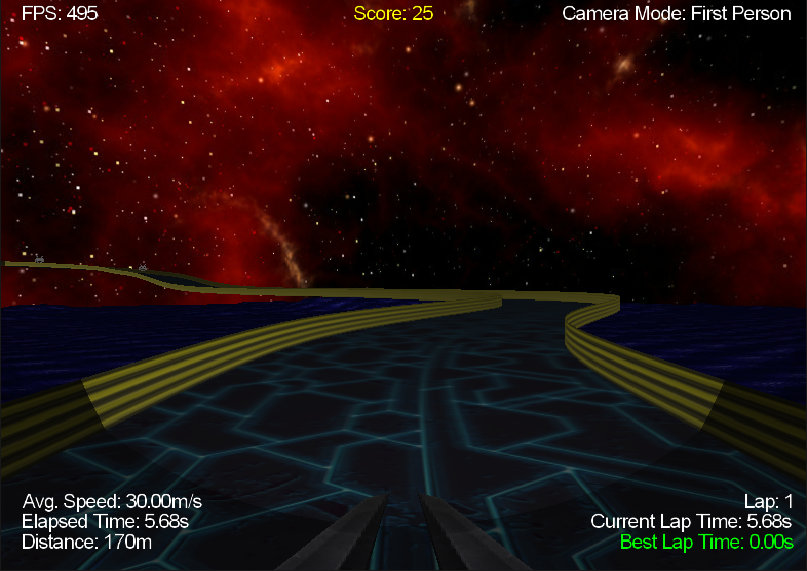
HUD
The head's up display contains information about the simulation and game-related information.
Top
- FPS counter to display the current framerate
- Score counter which shows score calculated from picking up in-game items
- Current camera mode
Bottom Left
- The average speed of the player in meters per second
- Total elapsed time of the simulation
- The total distance travelled by the player
Bottom Right
- A lap indicator - count of full circuit iterations
- Current lap time
- Best lap time
The graphical aspects of GUI were implemented using an alternative shader (textShader.vert and textShader.frag respectively).
Their purpose was to simply change the projection matrix mode to orthographic-mode in order to render 2D objects onto the screen. The projection matrix is then reset in order to render the 3D aspects of the game world normally.
Gameplay
Gameplay features include: allowing the player to speed up and slow down his spaceship as well as nudging it left / right throughout the simulation. This helps to give a racing-style feeling to the graphics simulation. It also allows the demonstration to be interactive, rather than a pre-set design that just encourages the viewer to just sit back and watch.
There are objects scatted throughout the circuit which can be picked up. These reward the player with 25 points per pickup.
The locations of the pickup spawns are generated using two individual random numbers. One of which is responsible for electing a specific control point from the level.txt file (to ensure the pickup actually spawns on the pre-defined path), the other specifies a horizontal offset within the range of the path width. More items can be added to the track by changing the constant global variable: NUMBER_OF_ITEMS (default: 20).
Advanced Rendering
Item Bobbing
The items present in the scene experience 'bobbing' (i.e. move up and down in y-position based on a timer) and rotate in a clockwise motion. This creates a more interesting effect than having purely static objects in the scene.
Implementing bobbing was fairly simple. An example of the Pickup's Update() function can be found below. The m_Bob vector is then added to the current position (via Translation of the ModelView Matrix Stack) before Rendering to create the effect.
void CPickup::Update()
{
    m_ClockDuration = (std::clock() - m_Clock) / (double)CLOCKS_PER_SEC;
    m_RotationDeg += 0.1f;

    if (m_ClockDuration > 0.5f)
    {
    	ResetClock();
    	m_BobUp = !m_BobUp;
    }

    if (m_BobUp) { BobUp(); }
    else { BobDown(); }

    m_Bob = glm::vec3(0.0f, m_VerticalOffset, 0.0f);
}

void CPickup::Render(glutil::MatrixStack &mvstack, CShaderProgram &shader, CCamera &camera)
{
    if(m_IsActive)
    {
        mvstack.Push();
        mvstack.Translate(glm::vec3(m_Position) + m_Bob);
        mvstack.Rotate(glm::vec3(0,1,0), m_RotationDeg);
        mvstack.Scale(0.02f);

        shader.SetUniform("matrices.modelViewMatrix", mvstack.Top());
        shader.SetUniform("matrices.normalMatrix", camera.ComputeNormalMatrix(mvstack.Top()));
        mvstack.Pop();
    }
}
It's also important to note the two member variables: m_RotationDeg, and m_IsActive. The m_RotationDeg is incremented by 0.1f each iteration and allows the creation of a rotation effect (via calling Rotate on the ModelView Matrix Stack) on the model.
The m_IsActive variable controls whether or not to render the specific pickup in question. It simply gets set to false when the player gets within a certain range (i.e. implementing distance-based collision detection) and thus stops it from being rendered.
The distance between the player and the pickup is implemented in a very simple fashion, purely using glm::length like so:
if(glm::length(m_pPlayer->GetPosition() – (*m_pPickups)[i]->GetPosition()) < 1.f)
Fog
I have implemented square-exponential fog in my game. The fog colour is quite dark and not 'very noticeable' to create a more realistic feel. It makes the scene appear more fluid by not having areas of the track visible at large ranges, and also prevents some distant objects from appearing into the viewport instantaneously.
I implemented fog with the help of the following formula:
\[C=w⋅S+(1–w)⋅F\]where \(C\) is the output colour, \(F\) is the fog colour, \(S\) is the scene colour, and \(w\) is the blending factor.
For square-exponential fog, the blending factor, \(w\), is calculated as:
\[w=exp(-(ρd)^2)\]where \(ρ\) is the fog density, and \(d\) is the distance of a specific point in space to the camera, or z in eye co-ordinates.
The formulae are applied in the Main Fragment Shader (mainShader.frag) like so:
if(bFog)
{
    float d = length(vEyePosition.xyz);
    float w = exp(-rho * d) * exp(-rho * d);
    vOutputColour.rgb = mix(fogColour, vOutputColour.rgb, w);
}
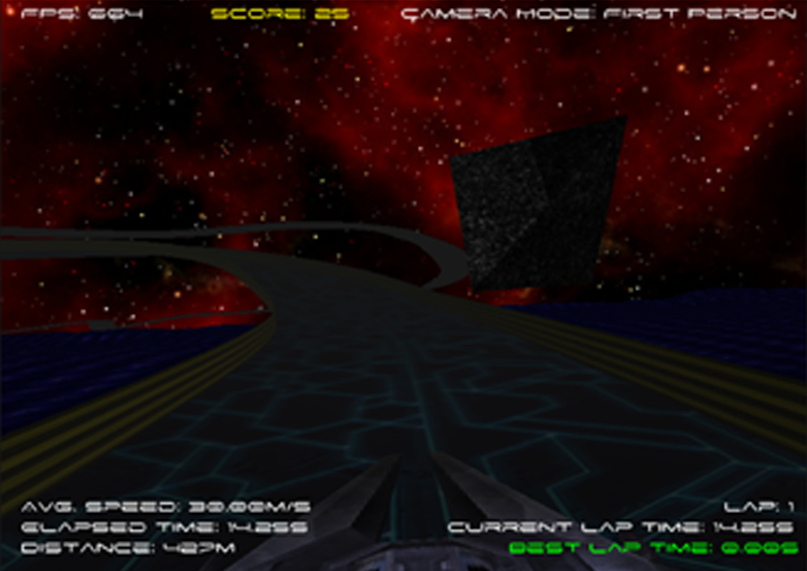 Square-exponential fog
Background Hue
Throughout the duration of the demonstration, the background objects and wire-colours change between variations of red, green, and blue to create a retro space-game feeling.
Fading in and out of the three core colours (Red, Green, and Blue) are controlled by two distinct timers. One timer which counts from 0.0 to 2.0f in increments of 0.001f, and another (Inverse Timer), which counts down from 2.0f to 0.0f in decrements of 0.001f.
In the main GameLoop() the timers are updated and toggle the function IncrCycle() (short for Increment Cycle) conditionally. Increment Cycle just increments a member variable used to distinguish which colours to adjust in the shader (as uniforms). The shader operates like so:
if(bDisco)
{
    switch(Cycle)
    {
        case 0: { vTexColour0.r += Time / 5; break; }
        case 1: { vTexColour0.r += InvTime / 5; break; }
        // { 2 , 3 } // Gap to simulate a pause in colour adjustment
        case 4: { vTexColour0.g += Time / 5; break; }
        case 5: { vTexColour0.g += InvTime / 5; break; }
        // { 6 , 7 } // Gap to simulate a pause in colour adjustment
        case 8:
        {
            vTexColour0.r += Time / 5;
            vTexColour0.g += Time / 5;
            vTexColour0.b += Time / 5;
            break;
        }
        case 9:
        {
            vTexColour0.r += InvTime / 5;
            vTexColour0.g += InvTime / 5;
            vTexColour0.b += InvTime / 5;
            break;
        }
        // { 10 , 11 } // Gap to simulate a pause in colour adjustment
       default:
       break;
    }
}
 The 'disco' effect - implemented as a colour-changing heightmap
Geometry Shader
I decided to experiment with the Geometry Shader to create modified / duplicated geometry in my scene. At first I tried duplicating the track and placing it at different positions and orientations in the environment (to give the illusion of other circuits in the same world) - it worked but didn't give the visual effects I desired.
I also created a damaged-vehicle effect by reducing the tessellation of the spaceship but wasn't happy with the outcome and thus decided to remove it.
I settled for the idea of duplicating existing geometry. Regarding my scene; I duplicated one of the background spaceships used for visual effects only.
The Geometry Shader I implemented is very simple; it contains two simple loops in the main() function which iterate over all of the vertices in the scene:
for(int i = 0; i < gl_in.length(); i++)
{
    gl_Position = gl_in[i].gl_Position;

    vEyeNorm = VertexIn[i].normal;
    vTexCoord = VertexIn[i].texCoord;
    vEyePosition = VertexIn[i].position;
    worldPosition = VertexIn[i].worldPos;

    EmitVertex();
}
EndPrimitive();

if(bApplyGeom)
{
    for(int i = 0; i < gl_in.length(); i++)
    {
        gl_Position = gl_in[i].gl_Position + vec4(200.0f, 30.0f, 0.0f, 1.0f);

        vEyeNorm = VertexIn[i].normal;
        vTexCoord = VertexIn[i].texCoord;
        vEyePosition = VertexIn[i].position;
        worldPosition = VertexIn[i].worldPos;

        EmitVertex();
    }
    EndPrimitive();
}
The first loop acts as a pass-through Geometry Shader; i.e. it does nothing but pass the information from the output of the vertex shader to the fragment shader. The second loop iterates over the same input data but offsets the positions of all vertices by the vector (200.0f, 30.0f, 0.0f, 1.0f).
Dependencies
This projects relies on the following external dependencies:
- OpenAssetImporter – for loading 3D mesh-based objects
- FreeType – for loading and rendering TrueType fonts
- FreeImage – for loading and rendering images/textures
- FMOD – for loading audio and playback
- OpenGL Utility Toolkit (GLUT) – for handling windows, input, and callbacks
- OpenGL Wrangler Library (GLEW) – for modern OpenGL extensions